- To turn unit on, press On/Off
- To start a new measurement, press the 2 (Sections) key
- Select a blank section by pressing appropriate numbered key
- Press the New softkey
- To enter new Site ID, press 1 (SID), enter name in SiteMonthDayYear format (e.g., 776a072015) and press Enter
- To change meter type, press 3 (Meter), select proper meter (default is Standard so make sure to switch to Pygmy, if applicable)
- Press Enter to get to beginning of measurement
- Water Edge appears on screen. Press 3 (Distance) to input tagline distance at edge of water (usually right side) and press Enter
- Press New Vertical, input tagline stationing and press Enter
- Press 6 (Stream Depth), input depth reading and press Enter
- Set meter to 0.6 depth of vertical and press Measure on keypad (Time will start counting upwards and then reset after first revolution is recorded; Time will stop counting after first revolution beyond 40 seconds)
- Repeat steps 9 – 11 for each vertical along remainder of cross-section
- When finishing edge of water is reached, press New Vertical and then Enter
- Press Edge, which will automatically default depth to 0
- To save measurement, press Menu
- To turn unit off, press On/Off
Category Archives: Equipment
Hydrological Services ML-1 – Transfer Data
Rainfall data downloaded from equipment in the field should ideally be transferred immediately from temporary media (e.g., USB key) to a folder on the laptop, and should be stored in the SiteMonthDayYear format (e.g., 066e072015).
Rainfall data downloaded via Bluetooth will not have site visit start/stop bucket tips to demarcate beginning and ending of data blocks, so those will have to be created for each site visit.
Data Downloaded via Cable
- Locate appropriate file on laptop and transfer to network drive (e.g., Q:\RAINSTNS\TL\199.15)
- Open Hydstra Explorer (HYEXPLORE) and select from the menu tree: Programs by Function > Hydstra/TS – Time Series > Hydstra Data Management > HYDMWB – Data Managers Workbench
- Press the Open folder icon or select File > Open
- In the Open Time Series Site dialog box that opens, enter the site number in general format (e.g., 199) in the Site Specifier field and press the Lookup Site button
- Select the specific site (e.g., 199A) that appears in the dialog box and then press OK
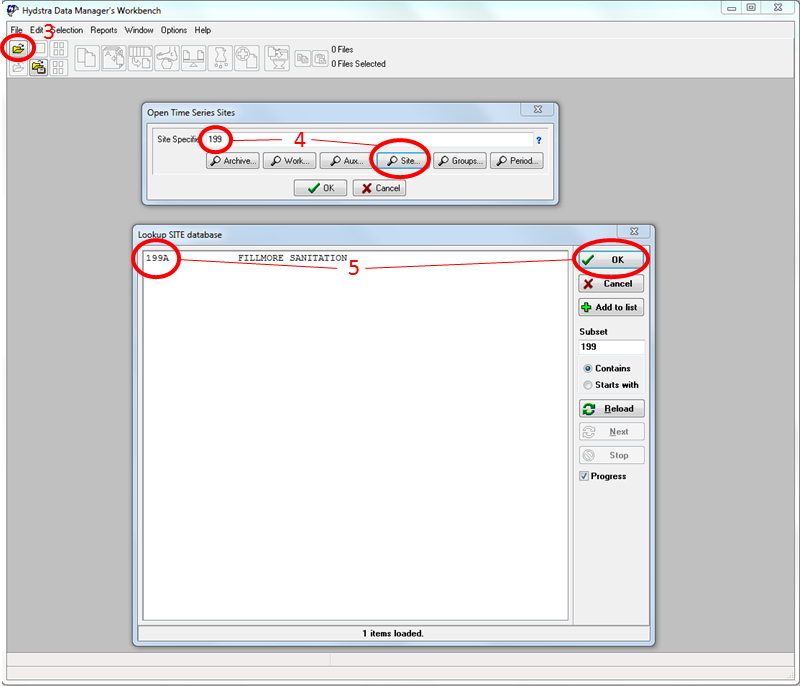
- In the Open Time Series Sites dialog box confirm that the proper site is shown, then press OK
- Single-click the site icon that has an A at the end (e.g., 199A A) and select File > Copy
- Select B as the New DataSource in the dialog box and then press OK; a new file icon is placed on the workbench (e.g., 199A B)
- Select File > Import Data and navigate to appropriate file on the network drive, as described in step 1, and then press Open
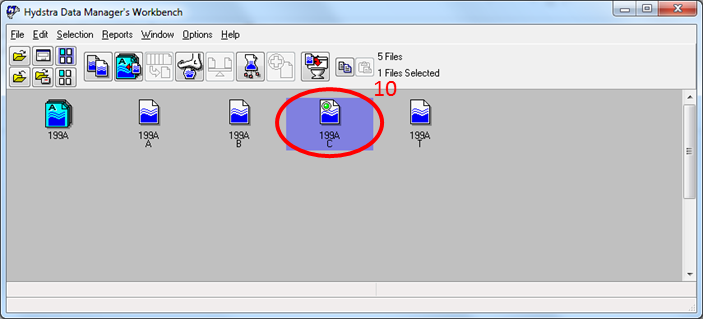
- Press Finish and close the event log that appears in HYEXPOLRE; a new file icon is placed on the workbench (e.g., 199A C) in HYDMWB
- Drag the C file to the B file and release
- In the Merge Files dialog box, select the Resolve Overlaps: Split blocks if necessary, preserving C File data radio button, verify the Delete Source box is checked and press OK
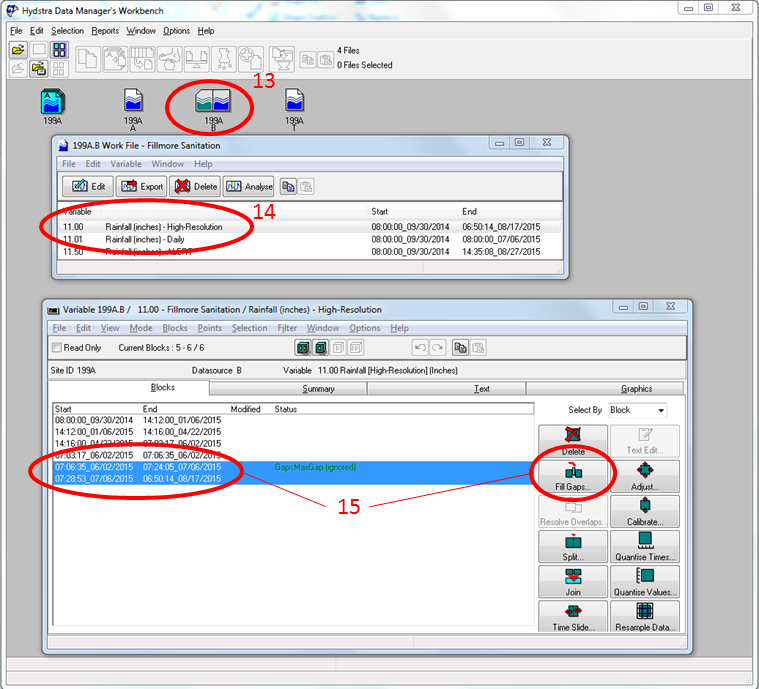
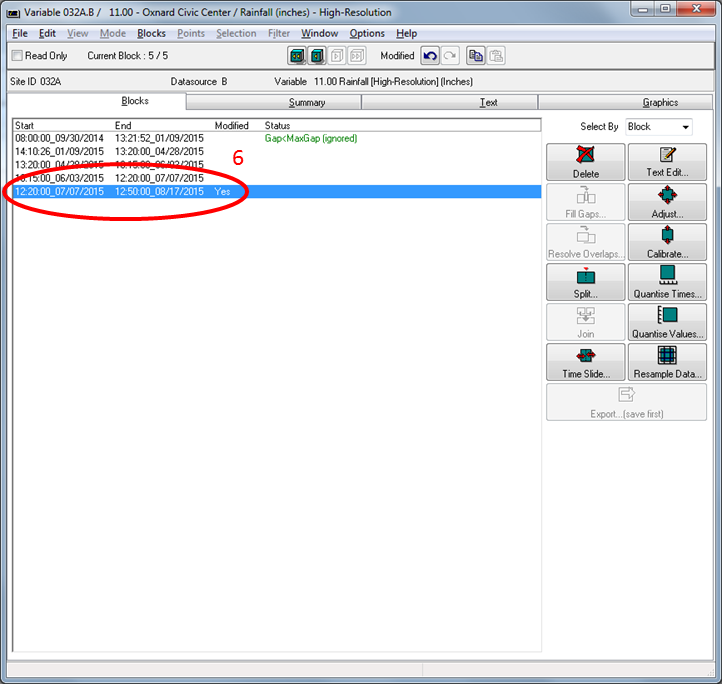
- Double-click the B file to open the work file
- In the dialog box that opens, double-click the row 11.00 Rainfall (inches) – High-Resolution
- To fill the data gap between previous visits, highlight most recent block and the one above it, then press Fill Gaps
- In the Fill Gaps dialog box, select the Extend Backwards radio button and select 2 Good quality edited data from the Inserted Quality dropdown and press OK (the beginning date of the most recent block should be adjusted backwards)
- Press the Text tab to view data in the newly modified block
 Select one or more records with Qual values of 151 and press the Quality edit button
- In the Quality Edit dialog box that opens select 2 Good quality edited data from the New Quality dropdown and press OK
- The last record in the block should have a Qual of 1, which indicates the bucket tip at the start of your field visit, as described here

- Select this last record and press the Data edit button
- In the Edit Data Point dialog box that opens, change the Value to 0.00 and the Quality to 2 Good quality edited data, the press OK

- Press Yes in the warning dialog box that opens
- Record the rainfall total in the yellow field book
- Select File > Close or press the X in the top right corner of the High-Resolution dialog box
- In the HYDMWB dialog box that opens, press Yes to save the file
- Select File > Close or press the X in the top right corner of the Work File dialog box
- Drag the B file to the A file and release
- In the Merge Files dialog box that opens, select the Merge (preserve B File data if duplicates) radio button, verify the Delete Source box is checked and press OK
- Close the event log that appears in HYEXPOLRE
- In the Hydstra Data Manager’s Workbench, verify that one of the site icons is highlighted and select File > Close Site
Data Downloaded via Bluetooth
- Follow steps 1-14, as described above
- Note that there are no bucket tips to indicate the beginning or end of the current or previous site visits, only the tips generated by rainfall between visits
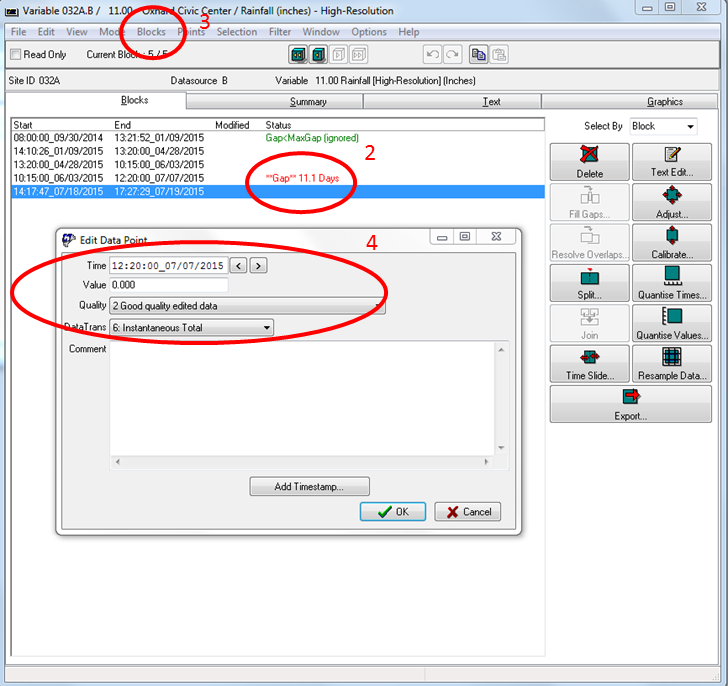
- To create a block of data with appropriate starting and ending times, select the current block, then select Blocks > Add New Point
- In the Edit Data Point dialog box, enter a Time (ending in :00 seconds) that matches the ending time and date of the previous block, enter a Value of 0.000 and select 2 Good quality edited data from the Quality dropdown, then press OK
- Repeat step 4 for the end of the current block, consistent with the end of your remote “site visit”
- Your new block of data should now stretch from the end of the previous site visit to the end of the current site visit (which will be used as the starting point for the next block of data for the subsequent site visit)
- Press the Text tab to view data in the newly modified block
- Select one or more records with Qual values of 151 and press the Quality edit button
- In the Quality Edit dialog box that opens select 2 Good quality edited data from the New Quality dropdown and press OK
- The last record in the block should have a Qual of 1, which indicates the bucket tip at the start of your field visit, as described here
- Select this last record and press the Data edit button
- In the Edit Data Point dialog box that opens, change the Value to 0.000 and the Quality to 2 Good quality edited data, the press OK
- Press Yes in the warning dialog box that opens
- Record the rainfall total in the yellow field book
- Select File > Close or press the X in the top right corner of the High-Resolution dialog box
- In the HYDMWB dialog box that opens, press Yes to save the file
- Select File > Close or press the X in the top right corner of the Work File dialog box
- Drag the B file to the A file and release
- In the Merge Files dialog box that opens, select the Merge (preserve B File data if duplicates) radio button, verify the Delete Source box is checked and press OK
- Close the event log that appears in HYEXPOLRE
- In the Hydstra Data Manager’s Workbench, verify that one of the site icons is highlighted and select File > Close Site
Hydrological Services ML1 – Download Data
ML1 data loggers are attached to TB3 tipping rainfall buckets at most sites. Please refer to this for further details on maintenance of TB3 units while downloading data from ML1s.
- Remove three screws from bottom of TB3 and remove circular enclosure
- Remove black cap from ML1 and connect to laptop via RS232 serial cable
- Open WinComLog
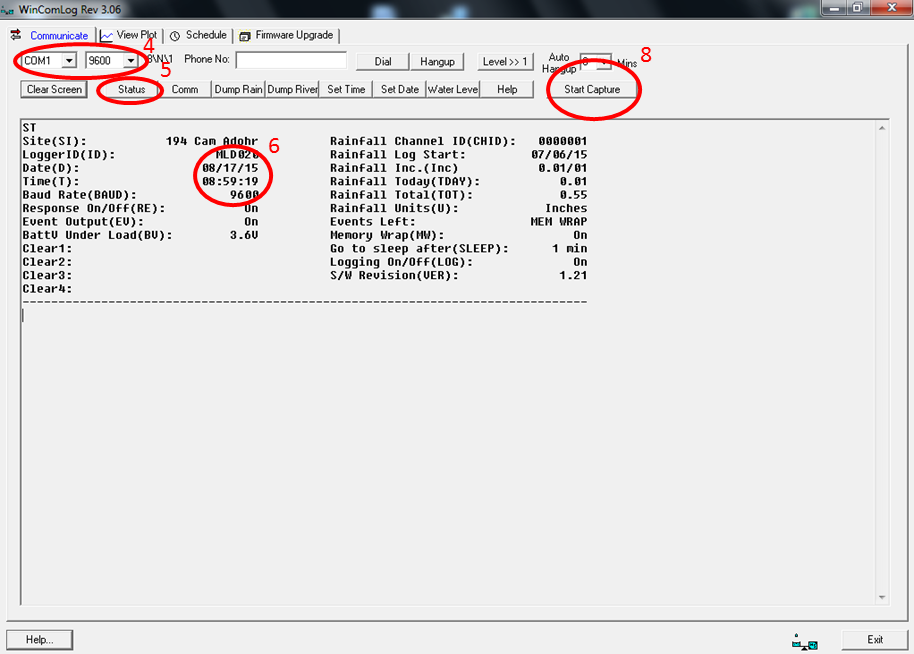
- Select appropriate COM port and baud rate (usually, this is COM1 at 9600 for hardwired connection, but will be different if connecting to ML1 via Bluetooth (see this)
- Once connection is made, press Status to display parameters
- Make note of time and date if different from that on laptop
- Tip rainfall bucket to verify connection and to establish beginning of site visit, Time/Date/Value are displayed
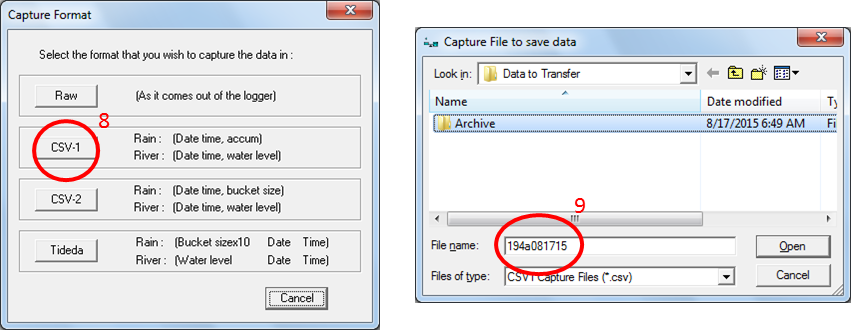
- To download data, press Start Capture and then CSV-1
- Navigate to data folder on field laptop and enter name in SiteMonthDayYear format (e.g., 194a081715)
- Press Dump Rain, Would you like to plot this data? is displayed, press No
- Once data download is complete, verify file in selected data folder on field laptop
- Return to WinComLog and press Stop Capture
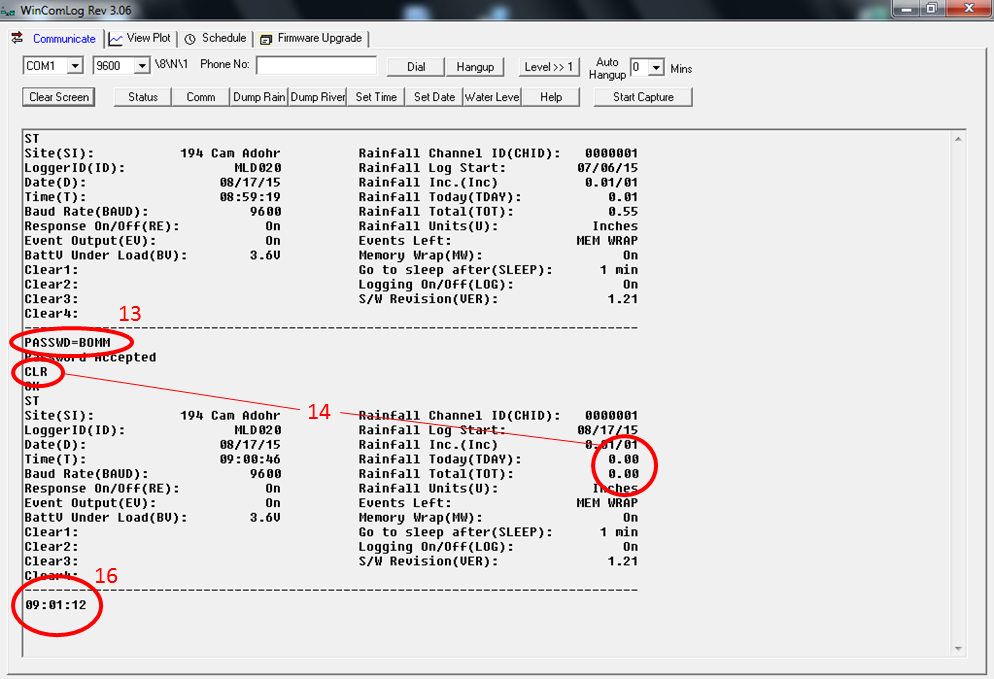
- Enter PASSWD=BOMM to access ML1memory
- To clear data, enter CLR and verify by pressing Status button (rainfall total should be reset)
- If appropriate, set time and date to match that of field laptop using TA function
- Tip rainfall bucket to mark end of site visit
- Perform field maintenance on TB3 as described here