The following are the basic steps required to set up a 5096 A2 transmitter. These steps are for rain and stream sites only:
- Upgrading 5096 Transmitter hardware (adding ALERT2 board and new radio)
- Adding additional components to site
- GPS antenna
- Polyphaser
- Solar Panel (if site does not have adequate power already)
- Programming 5096
- Novastar5 needs to have new ALERT2 point added (Scott will do this)
Equipment Needed
- Laptop with RS-232 cable
- Drill with 3/16”, 1/4” and 1/2” bits and hole saws
- GPS antenna, mount, hardware and cable
- Polyphaser with mount hardware and cable
- Upgraded ALERT2 5096
- 21 amp-hr battery
- Wattmeter
- Scanner
- ALERT2 field decoder
- Spare antenna
- Spare cables and cable fittings (N-type connectors, BNC connectors, adapters)
Common Commands
- SET-STAID – Sets the station id. For Ventura County, this is the station number (e.g., 188, but with a “20” prefix: 20188)
- SET-RF – Adjusts the parameters for the radio (Maxon 125E-v2 is inverted (1), all other radios (0))
- SET-TDMA – Used to program frame length, offset and delay of TDMA transmissions
- SET-EV – Used to adjust parameters for Event sensors
- SET-A2 – Sends all previously programmed parameters to the ALERT 2 board
- Attach antenna or dummy load to antenna port before the 5096 is powered up
- Attach GPS
- Connect Power
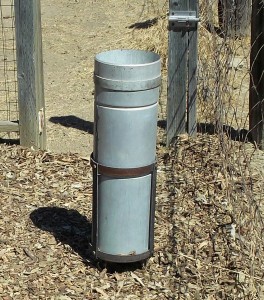
- Remove funnel from top of can and clean all dirt and debris
- Locate measuring mark on side of can; if no mark present, use the seam of the can
- Measure distance to oil surface from rim of can
- Record distance in yellow field book and subtract from previous visit to determine depth of rainfall
- If oil cap has turned white/milky:
- Pump material into “ook” container
- Add 1” of oil to can
- Measure new distance to water surface and record value in yellow field book
- Replace funnel on top of cap
This is the tipping rainfall bucket used at most rain gauge sites. Field maintenance is often performed concomitantly with data downloads, so please refer to this when servicing TB3 units.
Cleaning
- Loosen three screws at bottom of TB3 and remove circular enclosure
- Clean funnel and enclosure using paintbrush and/or damp rag
- Turn enclosure over an unscrew syphon
- Apply grease to syphon O-ring, if necessary
- Remove and clean filter screen
- Reassemble filter screen and syphon, hand-tighten back on to enclosure
- Remove debris and clean bucket assembly
- Verify base is level by utilizing bullseye levels
- Reattach enclosure and tighten 3 screws at bottom of TB3
Annual Maintenance
To decrease the likelihood of lost data, the 3.6V battery in ML1s must be changed each year during annual maintenance runs. Also, rain gages must be calibrated each year.
Dynamic Test
Prior to this dynamic test, disconnect TB3 from the terminal block (preferred) or from the transmitter. After the test is complete, make sure to reattach TB3 and confirm tips via website.
- Download data and clear ML1
- Place funnel back on top of TB3
- Set tripod on top of funnel
- Fill calibration cylinder until meniscus forms on top
- Screw on 100 mL nozzle taking care not to spill water
- Set on tripod, open valve and wait for water to drain out of bottle
- Target is 82 tips, but a range of 78-86 (5%) is acceptable
- Download data into calibration file and clear ML1 again
- If number of tips is out of range, perform static calibration below
Static Calibration
- Fill syringe with 10 mL of water
- Slowly add water to bucket on one side of TB3
- When bucket tips, record volume expelled from syringe
- Target is 6.8 mL, but a range of 6.46 – 7.14 mL (5%) is acceptable
- Repeat calibration on other side
- Use set screws underneath each bucket to increase or decrease the amount of water needed to tip the bucket
- Once calibrated, perform dynamic test (above) again
For the Aspiring Hydrographer
